Article ID: 080206sab
Last Reviewed: May 20, 2026
The information in the article applies to:
- The TermView.exe text terminal utility shipped with Pronto for Windows Revision 5.37 and later.
Target Audience
This article is aimed at:
- Technical Support Staff and Distributors of the Ranger Power Master Products; PM7000, PM6000, PM3000, PM2000, PM1000 and AP310.
Summary
TermView.exe is a utility that runs under Windows and provides a text terminal optimised for use with the text interface in the Loggers. This guide provides instruction for launching the utility and connecting to a Ranger Power-Master Logger.
The Ranger Power Master Data-Loggers provide a basic text interface as well as the Modbus interface used by Pronto for Windows, PmScreen and other utilities. The text interface provides low level diagnostic, setup and calibration functions.
Precautions
Inappropriate use of the Text command interface may cause loss or corruption of recorded data, either saved or in progress. Some commands will cause the loss or corruption of the system calibration requiring a return to the factory for repair.
It is not recommended that end users access the text interface on the Logger except under the guidance of technical support staff.
Before you start
Please ensure you have the following:
1) A copy of Pronto for Windows installed on the computer.
2) A Ranger Power-Master Data-Logger.
3) The appropriate lead or other interface to connect the computer to the Logger, Depending on the type of Logger to which you are connecting this could be USB, RS232, Infra-red, Ethernet or Bluetooth.
Launching TermView.exe
To launch TermView.exe select START then (PROGRAMS) – PRONTO FOR WINDOWS and the icon for TermView.exe will be seen in the menu.
If an icon for TermView.exe is not present:
a) Open the “Run” dialog (Windows Key and “R”).
b) Click on BROWSE and browse to the location where Pronto for Windows was installed,
by default this is <C:\PRONTO4W> or <C:\PROGRAM FILES\PRONTO4W>.
c) Select TermView.exe and click OPEN.
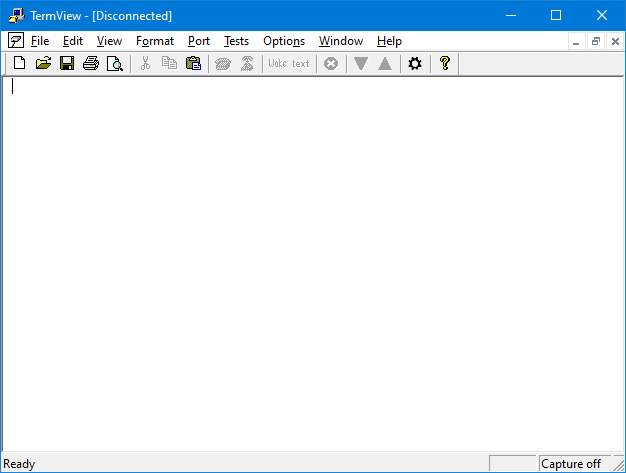
d) Finally on the RUN dialog click on OK, this will open TermView as shown below.
Connecting to a COM Port
If you know the Logger is connected to using COM1 to 9
1) Click on the PORT menu and select the port to which your Logger is connected from the drop down menu.
To open a connection to another port, or to find the port to which the Logger is connected,
1) Click on the PORT menu and select the item SETTINGS.
2) On the COM Port Settings dialog, type in the name of the Port if you know it, or click on SEARCH and then select the port from the drop down list.
3) Click on OK to open the port.
Selecting the Baud rate
To set a standard Baud rate
1) Click on the PORT menu and select the rate you wish to use, you may also use these ![]() buttons on the toolbar to step up or down through the standard baud rates.
buttons on the toolbar to step up or down through the standard baud rates.
To set another Baud rate
1) Click on the PORT menu and select the item SETTINGS.
2) On the COM Port Settings dialog, type in the baud rate you wish to use or select a standard baud rate from the drop down list.
3) Click on OK to set the baud rate.
Note that it is possible to enter a baud rate that is not supported by the hardware, in this case either an error message is given or the closest supported baud rate is used instead (without any error being shown).
See also: APPNOTE: Recommended baud rates for different Loggers
Connecting to a TCP/IP port
TermView Release 3.0 includes support for connection to TCP/IP ports.
To open a connection to a TCP/IP port:
1) Click on the PORT menu and select the item SETTINGS.
2) On the COM Port Settings dialog, enter the name of the server and the number of the port to connect to in the form <server>:<port>
Examples:
192.168.1.3:23 TermView opens port 23 on the server whose IP address is 192.168.1.3
192.168.1.123:502 TermView opens port 502 on the server whose IP address is 192.168.1.123
10.20.30.40:567 TermView opens port 567 on the server whose IP address is 10.20.30.40
0.0.0.0:789 TermView opens port 789 on this computer and listens for incoming connections
3) Click OK on the COM Port Settings dialog.
4) Click YES on the message This is not a valid COM port name…..Do you want to use it anyway ? and TermView will open the port.
Powering up the Logger
When a Logger has been running off its internal battery for a short period it will power down to conserve power.
The Logger must power up and complete its start-up process before it will respond to serial commands.
All Loggers will wake up when the charger is applied or AC Line power is present on V1 (phase A).
If the batteries are NOT exhausted then the Logger will also wake up after one of the following events.
For the PM3000 and PM6000
1) Press on the touch screen.
2) Send any serial traffic, for example a series of carriage returns.
For the PM7000
1) Open the lid.
2) Connect to the Bluetooth Port.
3) Send any traffic to either the Bluetooth or USB port.
For the PM1000 Mk1 and PM2000 with an infra-red interface
1) Send a wake up sequence of bytes. To do this from within TermView, from the TESTS menu select SEND WAKEUP or click on the ![]() button on the toolbar (PM1000 and PM2000 only).
button on the toolbar (PM1000 and PM2000 only).
For the PM1000 Mk2 with a USB interface
1) Power the Logger using the line power lead.
2) Connect to the USB or Bluetooth Port.
Putting the Logger into Text mode
A Logger has two modes of operation for its serial interface, Text mode and Modbus mode. To switch a Logger into Text mode and obtain the command prompt, from the TESTS menu select the item SET TEXT MODE, you may also click on the ![]() button on the toolbar.
button on the toolbar.
The Logger will reply with (assuming it is a PM3000):
    Slave 01 in text mode.

PM3000>
Once the Logger is in Text mode you may obtain the prompt by simply pressing return (which sends a <carriage return (CR)><line feed (LF)> pair).
The Logger will switch out of text mode and go to “Modbus” mode following any of these events:
1) upon reception of its own prompt i.e. the string “PM3000> ”
2) upon reception of “OK” followed by a <CR><LF> pair.
3) upon reception of a valid Modbus packet.
When the Logger is in Modbus mode echo is turned off and further text commands are ignored.
TermView Command Line Parameters
TermView.exe can be started from the command line and made to connect to specified serial port(s).
These examples show the syntax and options available. They assume that Pronto for Windows was installed into the folder “c:\pronto4w”.
To start TermView on COM1 at 115200 baud 2 stop bits and no parity:
>c:\pronto4w\TermView.exe "COM1:115200,N,8,2"
this alternative syntax also works
>c:\pronto4w\TermView.exe "COM1: baud=115200 parity=N data=8 stop=2"
as does this syntax:
>c:\pronto4w\TermView.exe COM1:
In this case the baud rate, parity, data and stop bits will be those used the last time TermView.exe was open.
To open two ports at once use the command:
>c:\pronto4w\TermView.exe "COM2:115200,N,8,2" "COM1:115200,N,8,2"
The order in which the windows are opened is the same as the order in which they appear on the line i.e. in this example COM2 first followed by COM1.
References
APPNOTE: Utilities Installed with Pronto for Windows.
APPNOTE: Testing the communication path between a computer and a Logger.