Article ID: 140820kae
Last Reviewed: July 7, 2023
The information in this article applies to:
- All Ranger Power Master Analyser Users
Target Audience
This article is aimed at:
- Those using the Classic version of Pronto for Windows software (images are taken using Pronto 5.73).
Summary
This application note details the sequence advised to use the ‘Exception Filter’ function in Pronto for Windows in order to create a report of events that have been triggered by the particular exception or exceptions input into the filter.
Before you start
Make sure you are using the Classic 5.xx version of Pronto that goes with this ‘How to’. Those using version 6.X can use the context sensitive Help given in that version of Pronto or read the Pronto Quick Reference Guide if available. Please note the Exception Filters in versions 6.1 and later are far more comprehensive and user friendly than the Classic version and we recommend that if you are learning how to do this from scratch that you learn using that newer version rather than the ‘Classic’ version (5.xx).
To use the Exception Filter function using Classic Pronto
When a new project is opened in Pronto you are presented with the Data Streams of your recording within the Pronto Browser.
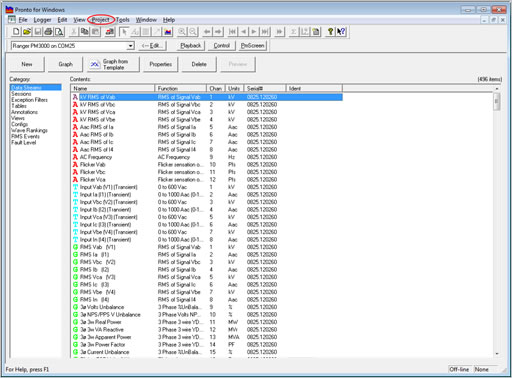
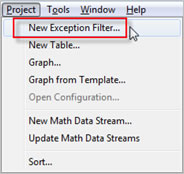
Select New Exception Filter from the Project Menu at the top of your screen.
The Exception Assistant will appear.
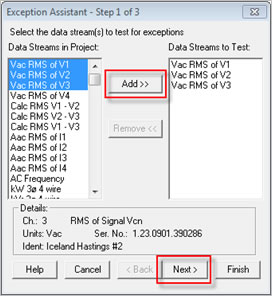
Select the data streams that you would like included in the Exception Filter. Once selected, click Add. When you have chosen all the data streams you would like, click Next to select the time scale of the test.
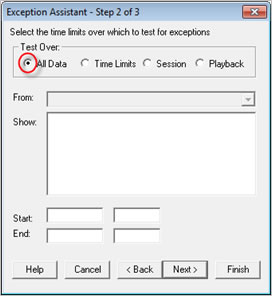
To choose to include all of the data in the project, click All Data; (as above). To choose specific time interval, click Time Limits, to select a particular Session or Playback (download) select the appropriate option. Then click on Next.
Now, make sure that all the relevant data streams are selected (to select more than one data stream at once hold down the Ctrl key whilst selecting them) to ensure that your limits are applied to each of those data streams. If you wish to apply different limits to different data streams then select and give limits to each one individually. Input the limits you would like to use, then select when you would like the test to be for, e.g. inside or outside the specific limits etc.
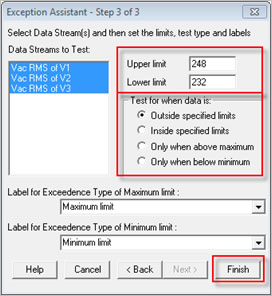
Check the labels you would like to use, then click Finish.
Once the test has been carried out you will be told how many results the filter has found. You may wish to repeat the test with different limits if 100s or even 1000s of results have been generated. If you wish to do this, click on Respecify.
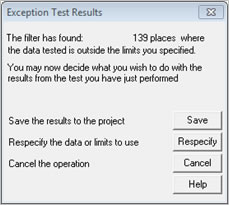
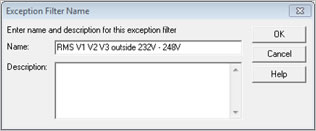
In this case there are 139, which is quite a lot to view, but we can still view them all the same. Click on Save and then name your filter results (using no more than 32 characters). You may add a description if you would like.
Your new exception filter will then appear in the Pronto Browser. Note Exception Filters is now selected in the left hand menu rather than Data Streams.
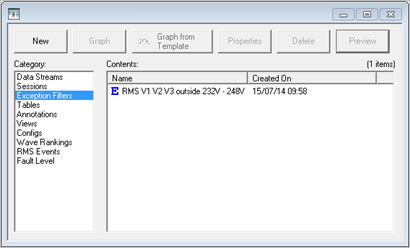
You can now preview a report of your exception list or view the individual exceptions in graph format.
Preview and Print
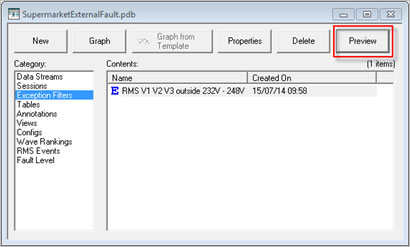
Highlight the relevant Exception Filter in the list and click on the Preview button just above. You will be presented with a Print Preview of your Exception (Exceedence) report.
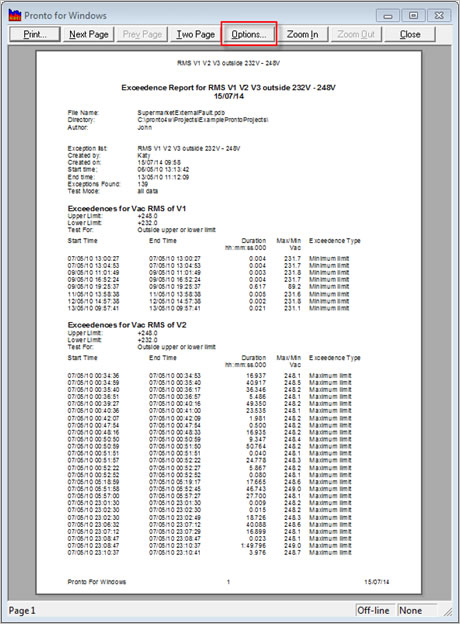
Click on Options and you will be able to add the full duration of the exceptions to your report.
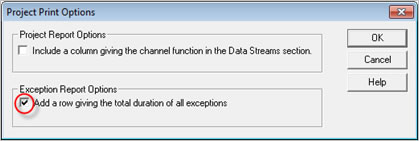
Check the box to Add a row giving the total duration of all exceptions. Click OK.
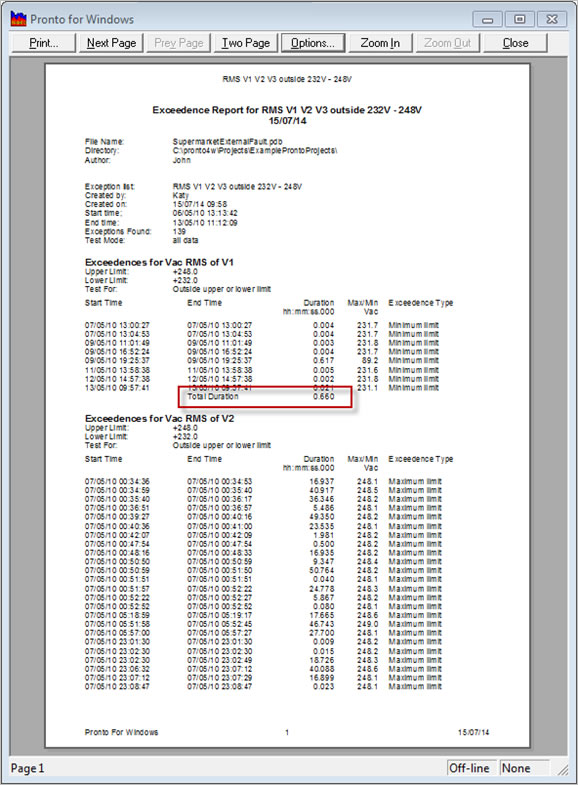
To print the report click on Print and follow the assistant.
Graphing Results
Back in the project browser, select the relevant Exception Filter and click Graph. Follow the assistant making sure that Exception is selected on step 2.
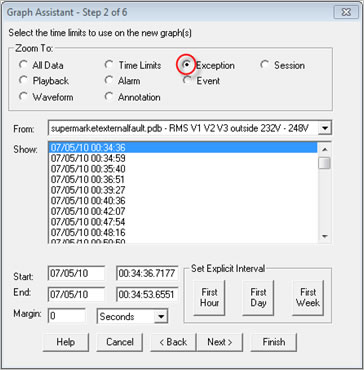
Follow the rest of the assistant by clicking on Next or click on Finish as required. A graph will be drawn of the first exception found in the filter.
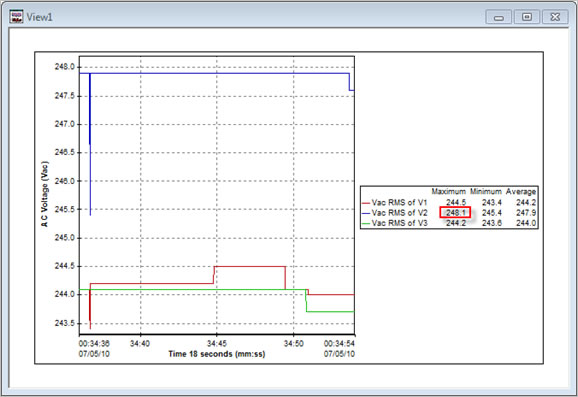
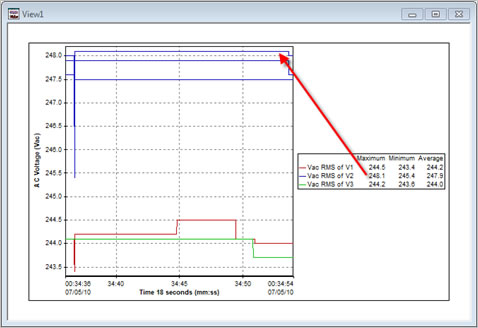
Remember that the exception filter will take into account the Adaptive Store max and min envelopes recorded so even if the average result does not exceed the limit and the max does, then that will be captured in the filter. See below, where V2 doesn’t seem to exceed the 248V limit given.
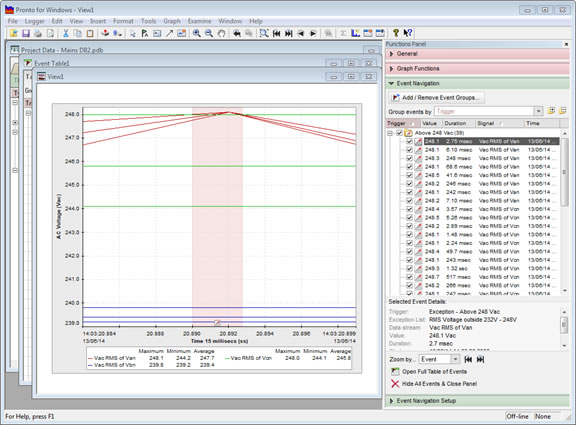
To insert the maximum and minimum traces on the graph, right click on a trace, select Format Trace and check the boxes referring to plotting Max and Min values.
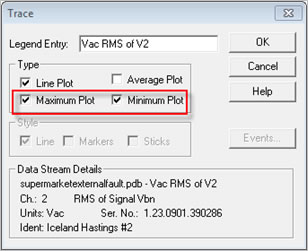
Click OK.
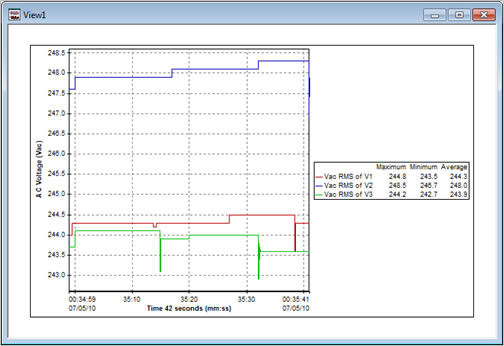
You can now see that the Max envelope exceeds the limits set in the exception filter.
To jump from exception to exception on the graph, use the double arrows in the tool bar.

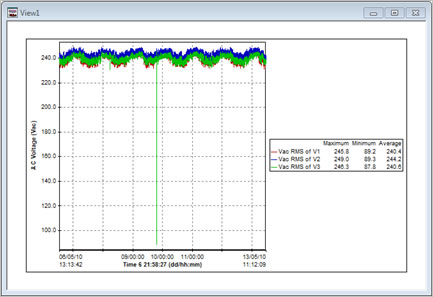
You can also select Zoom All from the Graph menu to see a graph of all of your data again.
Using Pronto version 6.1 and later
Using the more modern version of Pronto you can do the following with exception filters:
- Produce a table of exceptions
- Sort the table by data stream, exception duration, severity etc.
- Click on any row in the table to produce the relevant graph of that exception with an exception marker.
To download this version of Pronto, under the Help menu, select Check for Updates and follow the assistant choosing Pronto version 6.XX.
See also:
APPNOTE: How to use the ‘Examine’ Function in Pronto